Complete Jekyll SEO Tutorial: Google Search Console and Sitemap Configuration Guide
Can’t Find My Blog on Google?
Have you encountered the situation where your newly built Jekyll website can’t be found on Google no matter how you search? Don’t worry, your website isn’t broken.
The issue is that we haven’t “introduced ourselves” to Google yet. Just like a newly opened physical store needs to register its address, websites also need to proactively inform search engines of their existence.
To let search engines know your website exists, you need to complete the following two steps:
- Submit your website to Google Search Console
- Submit your Sitemap
These two steps are like giving Google a “business card” and “map” of your website, letting it know where to find your content.
Step 1: Add Website to Google Search Console
First, we need to tell Google that our website exists. This is as important as registering your store information in a phone directory.
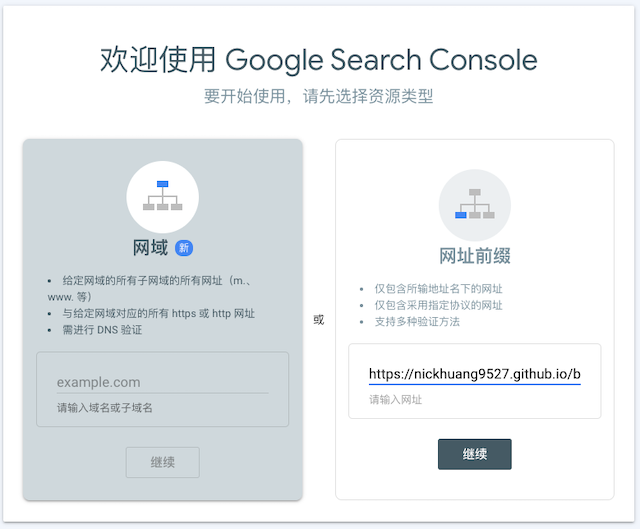
Add Website to Search Console
Go to 👉 Google Search Console
In the verification method options, choose the “URL prefix” method. This approach is simpler and suitable for personal blogs.
Enter your blog URL (recommend using HTTPS format), then click “Continue.”

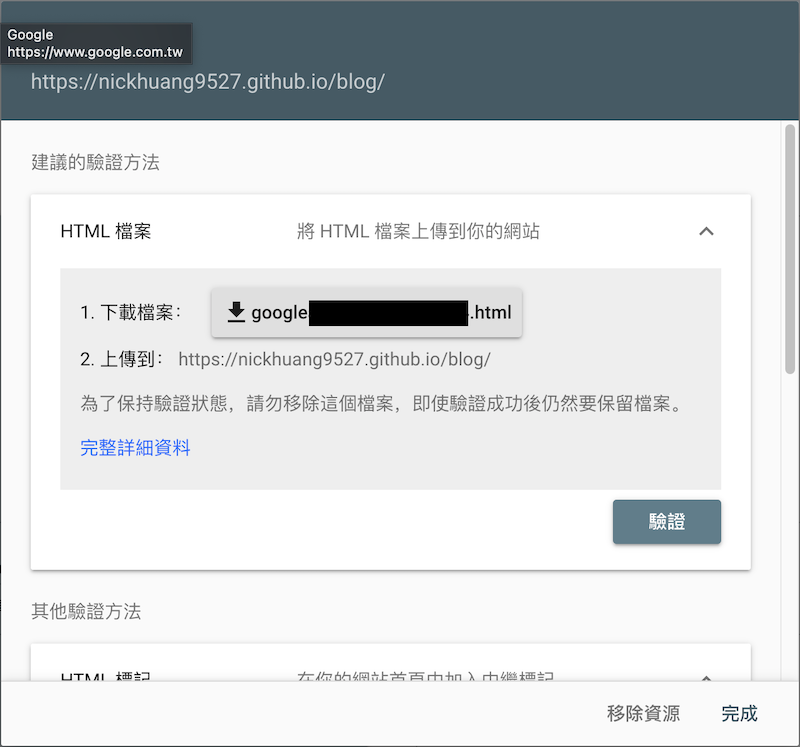
Download and Deploy Verification File
Next, Google will require you to prove that this website is indeed yours. The system will provide a verification file googlexxxxxxxxxx.html. Please download it and place it in your Jekyll root directory.
# Place in project root directory
mv ~/Downloads/googlexxxxxxxxxx.html ./googlexxxxxxxxxx.html

# Confirm file is in version control and push
git add googlexxxxxxxxxx.html
git commit -m "[seo] Add Google Search Console verification file"
git push origin main  # or your branch name
Complete Verification Process
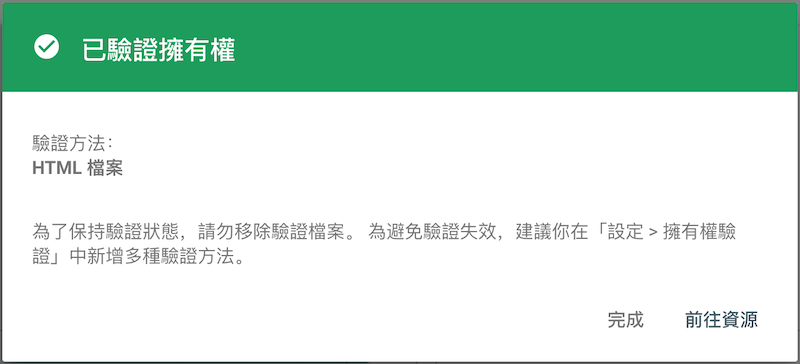
After the file is uploaded, return to the Search Console page. Click the “Verify” button to let Google confirm that the verification file has been correctly deployed.

If everything goes well, you’ll see a successful verification screen. This means Google has acknowledged you as the owner of this website!

Step 2: Submit Sitemap
Now Google knows your website exists, but it doesn’t know what content is inside your website. This is where Sitemap comes to help!
What is a Sitemap?
A Sitemap is an XML format “site map.” It tells search engines about all the pages on your website, including links to each page, last update times, and other important information.
With a Sitemap, Google can find and index your blog content faster and more comprehensively. It’s like giving a postal worker a detailed address list, letting them know where to deliver mail.
📖 Want to learn more? Check out Google’s official explanation: What is a Sitemap?
How to Generate Sitemap for Jekyll Website
Jekyll can automatically generate Sitemaps through plugins. We only need simple configuration to complete this.
1️⃣ Edit Gemfile to add sitemap plugin
First, find the Gemfile file in your project root directory and add the following content:
group :jekyll_plugins do
  gem "jekyll-sitemap"
end
2️⃣ Enable plugin in _config.yml
Next, edit the _config.yml file and add to the plugins section:
plugins:
  - jekyll-sitemap
3️⃣ Install plugin and recompile website
Execute the following commands in terminal to install the plugin and restart Jekyll:
bundle install
bundle exec jekyll serve
After completion, check the _site/ folder. You’ll find there’s now a sitemap.xml file inside, which means the Sitemap has been successfully generated!
4️⃣ Submit Sitemap to Google
Now we need to give this site map to Google. Return to Search Console and find the “Sitemaps” section in the left menu.
In the “Add a new sitemap” field, enter:
sitemap.xml
Then press the “Submit” button.

After successful submission, Google will begin crawling and indexing your website content based on your Sitemap.
✅ Congratulations! You’ve Completed Basic SEO Setup!
Now your Jekyll website is officially “registered” in Google’s system! Google will begin crawling your website content.
What Happens Next?
Although your website won’t immediately appear in search results, this is normal. Google needs time to:
- Crawl your website: Visit your pages one by one based on the Sitemap
- Analyze content quality: Evaluate whether your articles are valuable to readers
- Build index: Add your pages to the search database
As long as you continue updating quality content and maintaining website activity, your blog will gradually be found by more people.
Need More Help?
TIP
If you have different verification methods or want to learn more SEO settings, feel free to leave comments or write to me. Let’s research improving blog visibility together 🙂
Enjoy Reading This Article?
Here are some more articles you might like to read next: