Complete Guide: Build a Professional Blog with Jekyll + Minimal Mistakes on GitHub Pages
Why Start a Technical Blog?
In my professional work, I frequently gain inspiration and help from technical websites and blog articles. To document my learning, review knowledge, and help others, I decided to create my own technical blog.
A well-maintained blog offers several benefits:
- Knowledge Documentation: Preserve your learning journey
- Community Building: Share insights with fellow developers
- Career Growth: Establish thought leadership in your field
- Skill Development: Improve writing and communication skills
Why Choose Jekyll + Minimal Mistakes?
Jekyll Advantages:
- Markdown Support: Write content in Markdown, automatically converted to HTML
- Active Community: Large ecosystem with extensive documentation
- Highly Customizable: Complete control over design and functionality
- Static Site Generation: Fast loading times and excellent SEO
- Git Integration: Version control for your entire website
Minimal Mistakes Theme Features:
- 9k+ GitHub Stars: Widely adopted and well-maintained
- Dark Mode Support: Modern user experience
- Image Zoom: Medium-like image viewing experience
- Responsive Design: Works perfectly on all devices
- SEO Optimized: Built-in SEO features and structured data
I previously used Octopress, but since it’s no longer maintained and has limited themes, I chose Jekyll to rebuild my blog 👉 Octopress
Now, let’s build your professional blog step by step!
Why Use GitHub Pages?
GitHub Pages is free, requires no server management or SSL certificates, and automatically builds and deploys your site with just one push. You can later bind your own domain and SSL certificate.
Key Benefits:
- Zero Cost: Completely free hosting
- Automatic Deployment: Push to trigger builds
- SSL Included: HTTPS by default
- Custom Domains: Use your own domain name
- Version Control: Full Git integration
Prerequisites
Register a GitHub Account
Install Git for Version Control
# macOS
brew install git
git --version

# Ubuntu/Debian
sudo apt-get install git

# Windows
# Download from https://git-scm.com/
Install rbenv (Ruby Version Manager)
# macOS
brew install rbenv
rbenv init

# Add to shell configuration
echo 'export PATH="$HOME/.rbenv/bin:$PATH"' >> ~/.zshrc
echo 'eval "$(rbenv init -)"' >> ~/.zshrc

# Verify installation
rbenv -v
Install Ruby
# Install Ruby 3.0.0 (or latest stable version)
rbenv install 3.0.0
rbenv global 3.0.0
rbenv rehash

# Verify installation
ruby -v
Check RubyGems
gem update --system
gem -v
Verify GCC/Make Installation
gcc -v
g++ -v
make -v
WARNING
Missing any of the above environment components may cause errors during Jekyll installation.
Create Your Jekyll Blog
Reference official tutorial: Creating a GitHub Pages site with Jekyll
Navigate to Your Development Folder
cd PARENT-FOLDER
Initialize Git Repository
git init blog
cd blog
Create gh-pages Branch
git checkout --orphan gh-pages
Create Jekyll Site (Skip Initial Bundle)
jekyll new --skip-bundle .
Modify Gemfile for GitHub Pages
# gem "jekyll"
gem "github-pages", "~> GITHUB-PAGES-VERSION", group: :jekyll_plugins
⚠️ Replace
GITHUB-PAGES-VERSIONwith the version listed here
Install All Gems
bundle install
Configure _config.yml
domain: my-site.github.io
url: https://my-site.github.io
baseurl: /blog/
Add webrick Gem (Avoid Serve Errors)
bundle add webrick
Create favicon.ico
touch favicon.ico
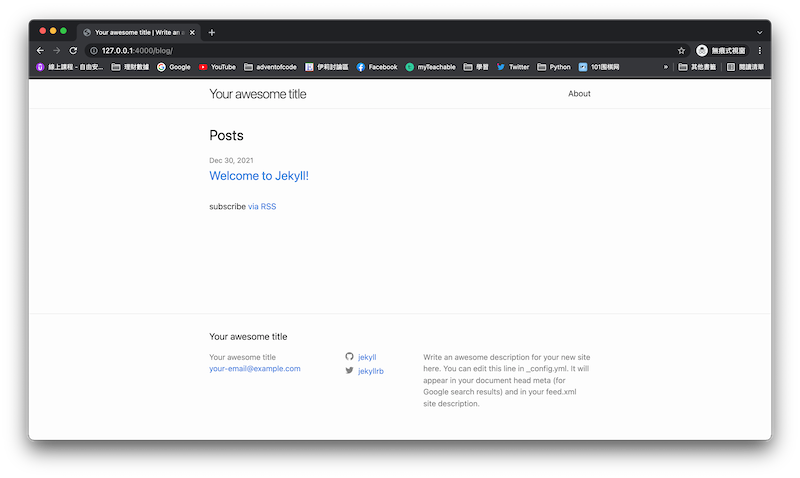
Test Jekyll Site Locally
After initialization, you can preview your site using Jekyll’s built-in server.
bundle install
bundle exec jekyll serve
The terminal will display:
Server address: http://127.0.0.1:4000/
Open this URL to see your website!
Deploy to GitHub Pages
Next, we’ll deploy the site to GitHub.
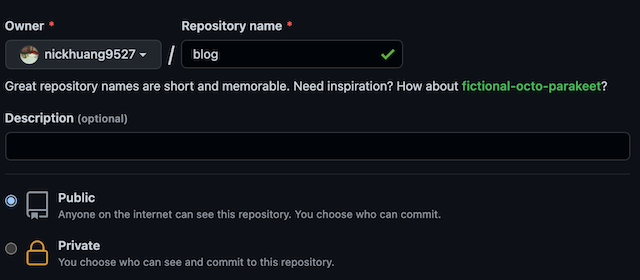
1️⃣ Create a GitHub Repository
- Recommended: Use public repository
- Name it freely, e.g.,
blog
2️⃣ Link Local Project to GitHub Repository
git add .
git commit -m "[feature] Initial GitHub Pages site with Jekyll"
git remote add origin https://github.com/USERNAME/REPOSITORY.git
git push -u origin gh-pages
Note: If you choose
gh-pagesas the deployment source, ensure GitHub Pages settings select thegh-pagesbranch
3️⃣ Access Your Live Site
Return to your GitHub repository page and click:
Settings ➝ Pages ➝ Site URL
Default URL will be:
https://USERNAME.github.io/REPOSITORY/
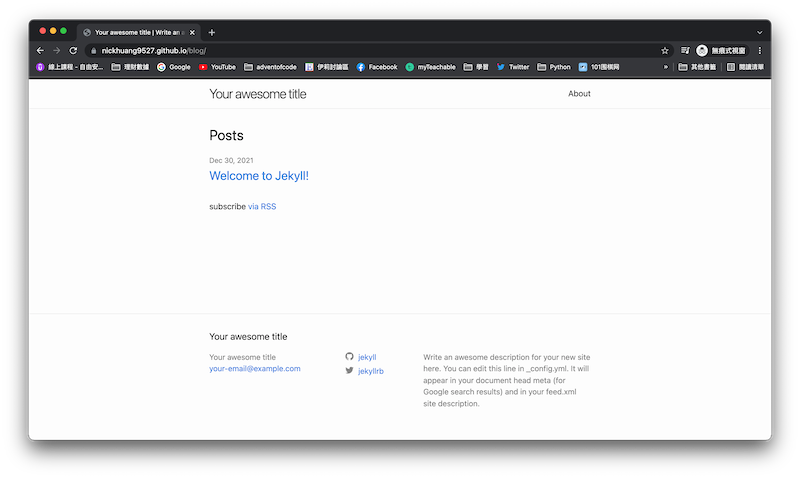
🎉 Congratulations! Your site is now live!
Beautify Your Blog: Install Minimal Mistakes Theme
Minimal Mistakes is a modern, feature-rich Jekyll theme. We’ll install it using the “Remote Theme” method.
📚 Official Documentation: Minimal Mistakes Quick-Start Guide
1️⃣ Edit Gemfile
source "https://rubygems.org"

gem "github-pages", group: :jekyll_plugins
gem "jekyll-include-cache", group: :jekyll_plugins
2️⃣ Edit _config.yml
remote_theme: "mmistakes/minimal-mistakes@4.24.0"

plugins:
  - jekyll-include-cache
❗ Remove other
theme:orremote_theme:settings to avoid conflicts
🧩 Keep your previousdomain,url,baseurlsettings
3️⃣ Install All Gems
bundle install
4️⃣ Adjust File Structure
- Replace
index.mdwith Minimal Mistakes template (or create new pages) - Modify
_posts/0000-00-00-welcome-to-jekyll.md:layout: post - Delete
about.md(if you don’t plan to use it)
🔁 Restart Site and Check Results!
bundle exec jekyll serve
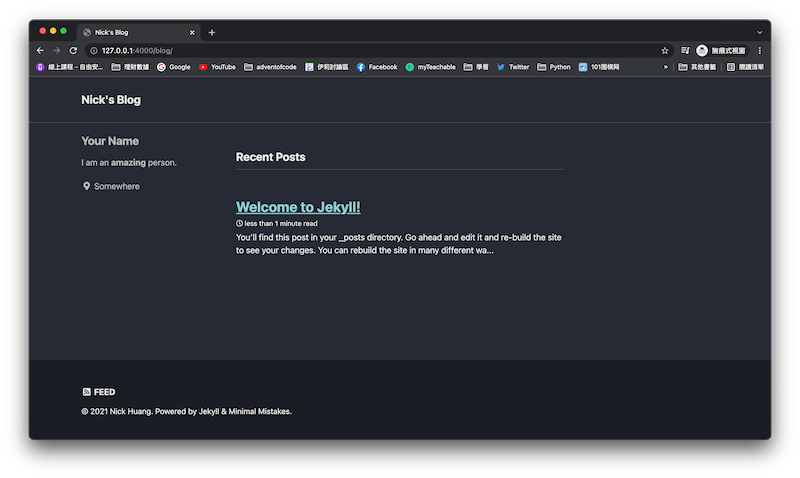
✅ Final GitHub Upload
git add .
git commit -m "[feature] Add Minimal Mistakes theme to Jekyll"
git push origin gh-pages
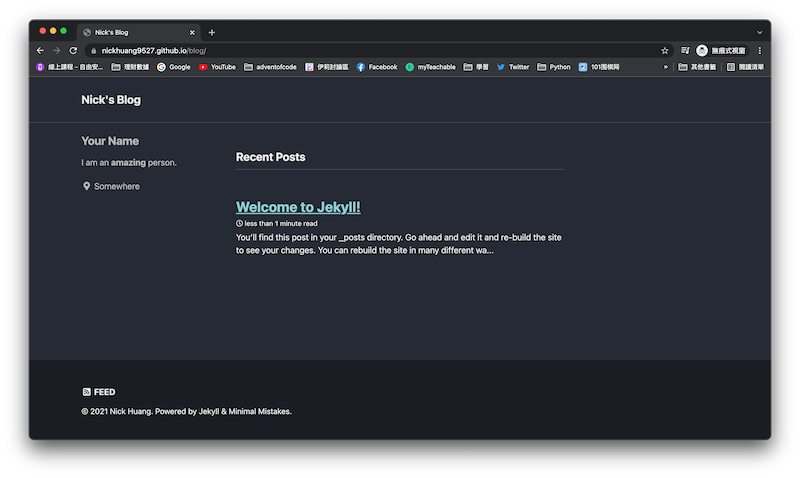
🎉🎉🎉 Done! You’ve successfully created a modern technical blog using Jekyll + Minimal Mistakes on GitHub Pages!
Advanced Customization Tips
SEO Optimization
# _config.yml
title: "Your Blog Title"
description: "Your blog description for search engines"
author:
  name: "Your Name"
  avatar: "/assets/images/bio-photo.jpg"
  bio: "Your bio"
  location: "Your Location"
  links:
    - label: "GitHub"
      icon: "fab fa-fw fa-github"
      url: "https://github.com/yourusername"
Custom Domain Setup
- Purchase domain from provider (Namecheap, GoDaddy, etc.)
- Add CNAME record pointing to
username.github.io - Create
CNAMEfile in repository root with your domain - Enable custom domain in GitHub Pages settings
Performance Optimization
- Image Optimization: Use WebP format and lazy loading
- Minification: Enable CSS/JS minification
- CDN: Use GitHub Pages CDN for global distribution
- Caching: Implement proper cache headers
Troubleshooting Common Issues
Bundle Install Errors
# Clear gem cache
gem cleanup
bundle clean --force

# Reinstall gems
bundle install
Jekyll Serve Issues
# Check Ruby version compatibility
ruby -v
gem list jekyll

# Update Jekyll
gem update jekyll
GitHub Pages Build Failures
- Check GitHub Pages build logs
- Ensure all gems are in
Gemfile - Verify
_config.ymlsyntax - Check for unsupported plugins
Best Practices for Blog Maintenance
Content Strategy
- Regular Updates: Post consistently (weekly/monthly)
- Quality Content: Focus on value, not quantity
- SEO Optimization: Use proper headings, meta descriptions
- Internal Linking: Link between related posts
Technical Maintenance
- Regular Updates: Keep Jekyll and gems updated
- Backup Strategy: Use Git for version control
- Performance Monitoring: Check site speed regularly
- Security: Keep dependencies updated
Related Resources
- Jekyll Official Documentation
- Minimal Mistakes Theme
- GitHub Pages Documentation
- Ruby Installation Guide
- Markdown Guide
If you have different methods, questions, or want to further customize your theme, feel free to leave a comment or email me. Let’s grow and learn together! 🙂
Enjoy Reading This Article?
Here are some more articles you might like to read next: